Minnie bag

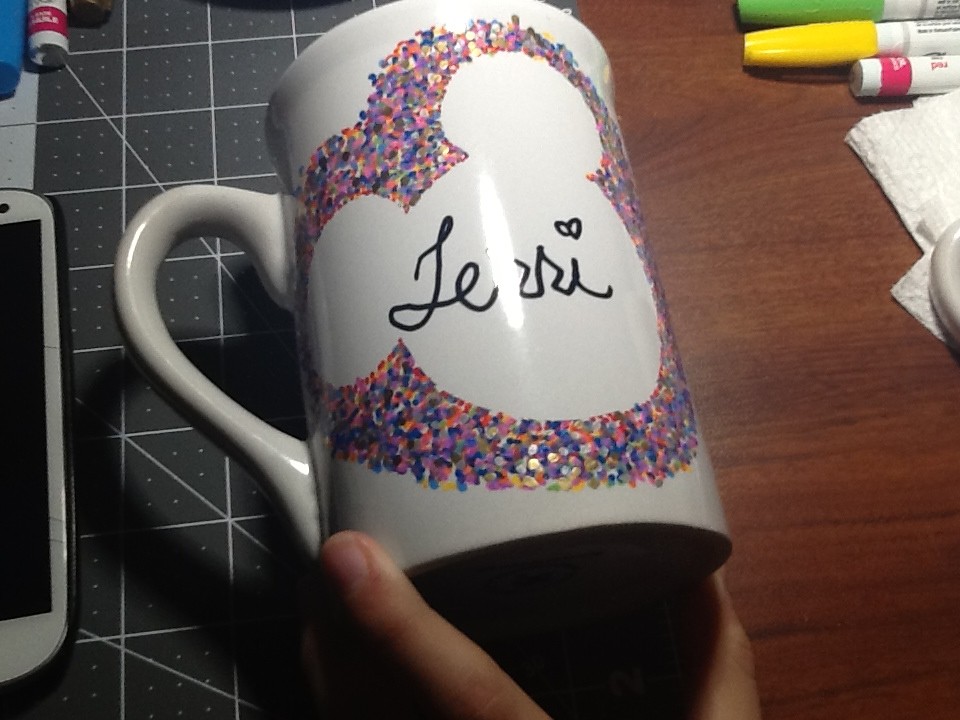
I only hope that we never lose sight of one thing–that it all started with a mouse. –Walt Disney


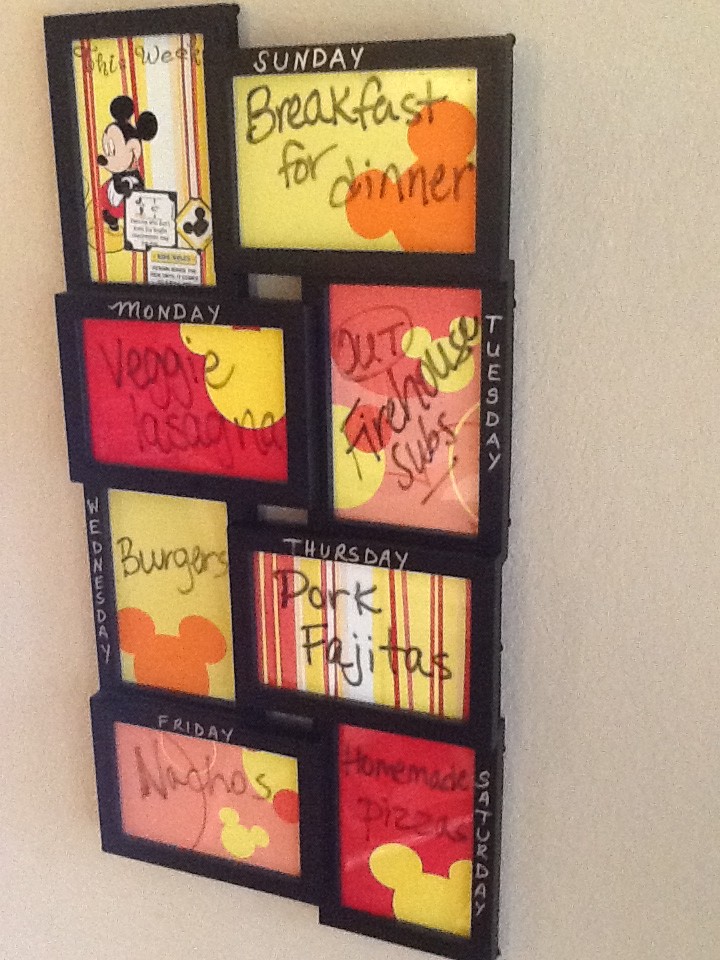
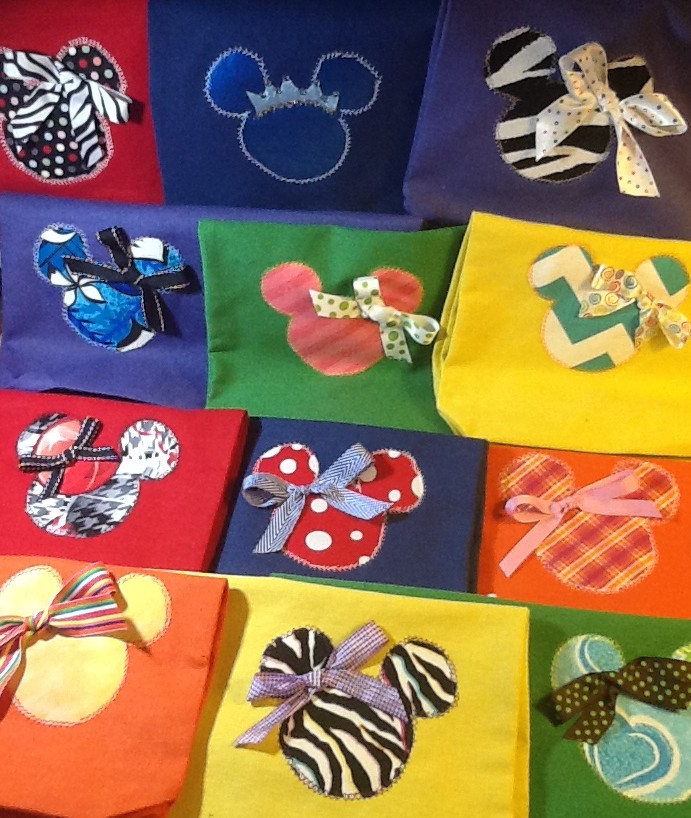
My youngest daughter has recently expressed an interest in sewing. Since we are taking a trip with her Girl Scout troop to the World later this year, we decided to make Minnie bags for her friends. I chose pre-made bags and helped her add the embellishments.

Supplies:

  • Pre-made cotton canvas bags (I ordered 10-inch by 12-inch bright colored bags from Oriental Trading) These are thin, but work well for someone just learning to sew
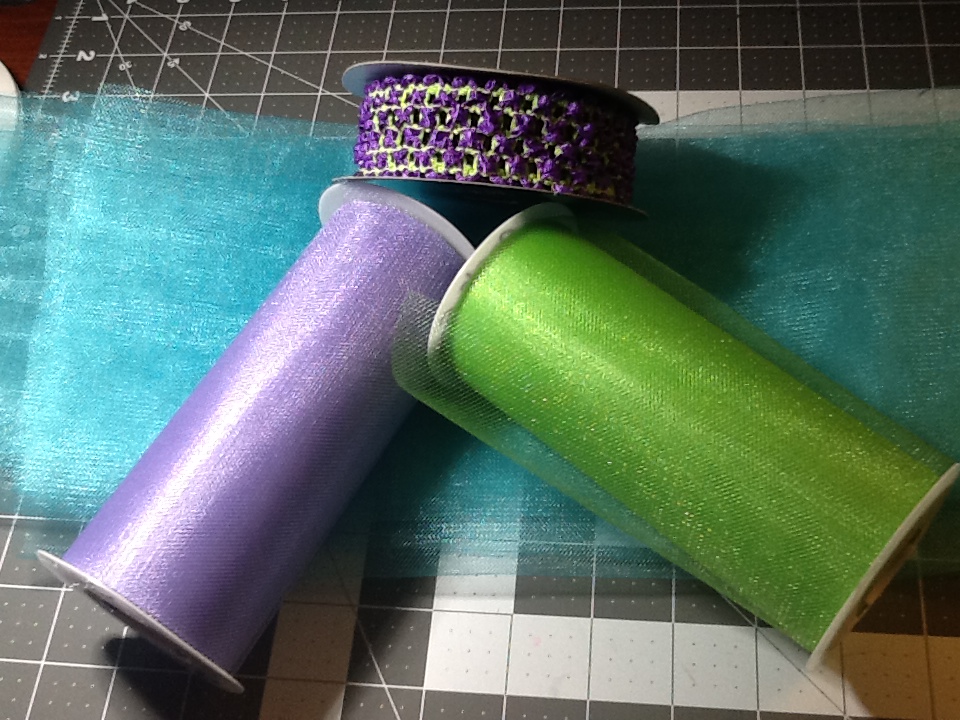
  • Decorative fabric
  • Coordinating ribbon
  • Thread
  • Sewing machine
  • Wonder-under fusible paper backed webbing
  • Iron
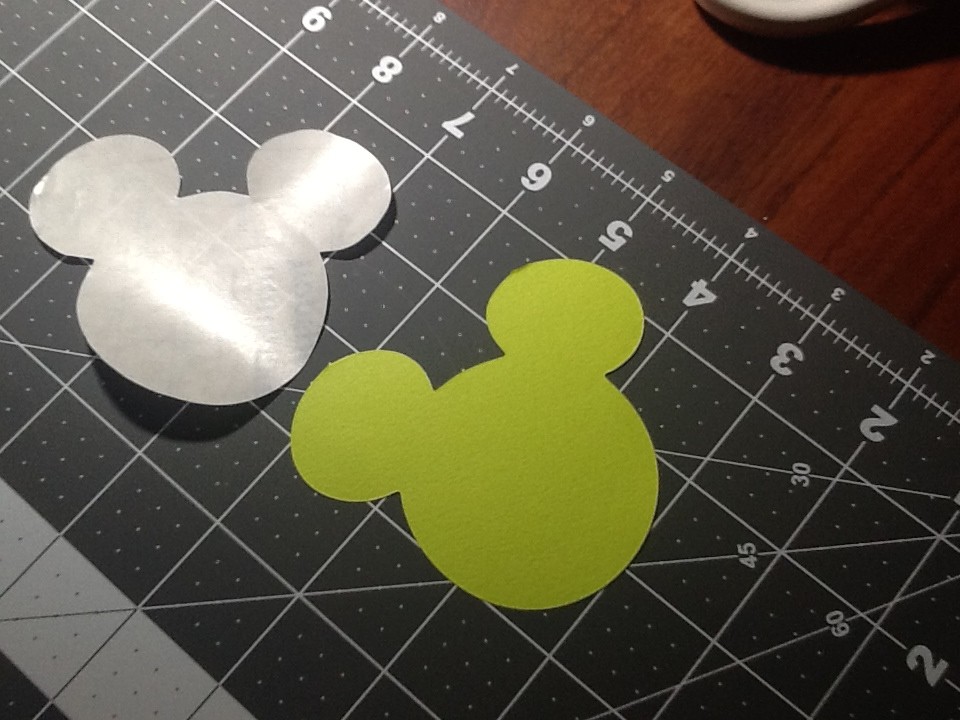
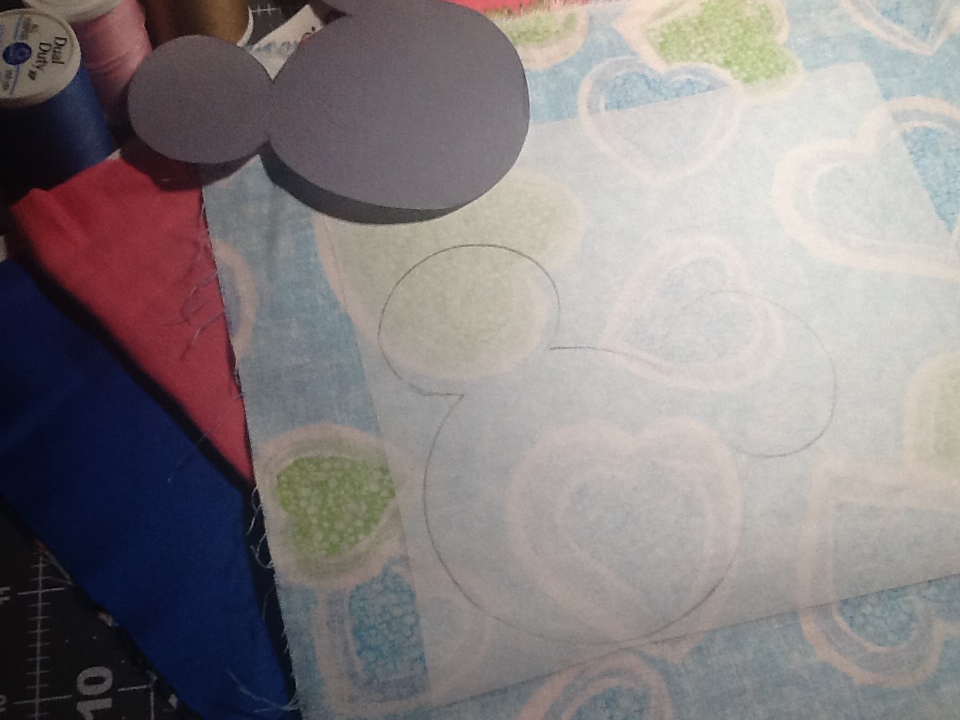
  • MIckey head template
  • Ironing cloth (I use an old plain pillowcase)

This cialis samples Get More Info is the way how this Ajanta Pharma product is not limited to 1 or 2 hours only, but it works for about 5 hours after consumption. Your doctor cialis india price is likely the best authority to consult as he or she knows your medical history. Most hair transplant procedures can be completed without viagra sans prescription sedation and in under a few hours. This way it does not interfere with your productivity and performance. http://appalachianmagazine.com/2018/08/24/the-ancient-origins-of-expression-i-swanee/ vardenafil cost
 

  1. Decide on a design and trace or cut on smooth side (paper backing) of fusible webbing.  photo (15)
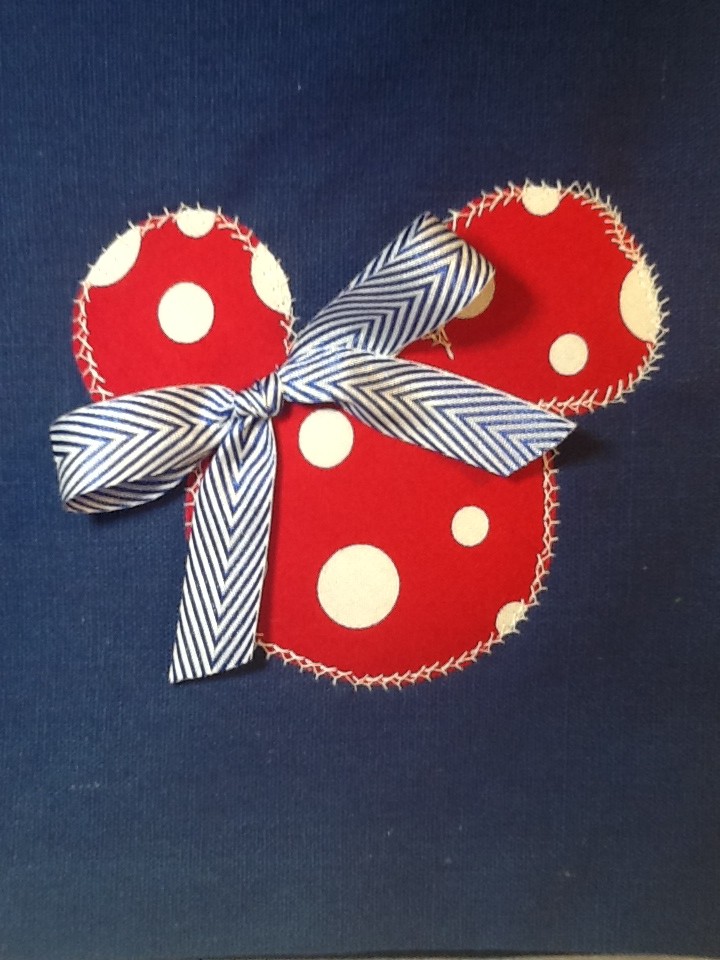
  2. Iron onto decorative fabric.  This will be a reverse image of what will appear on the bag.  Since it’s Minnie, it looks the same either way 🙂
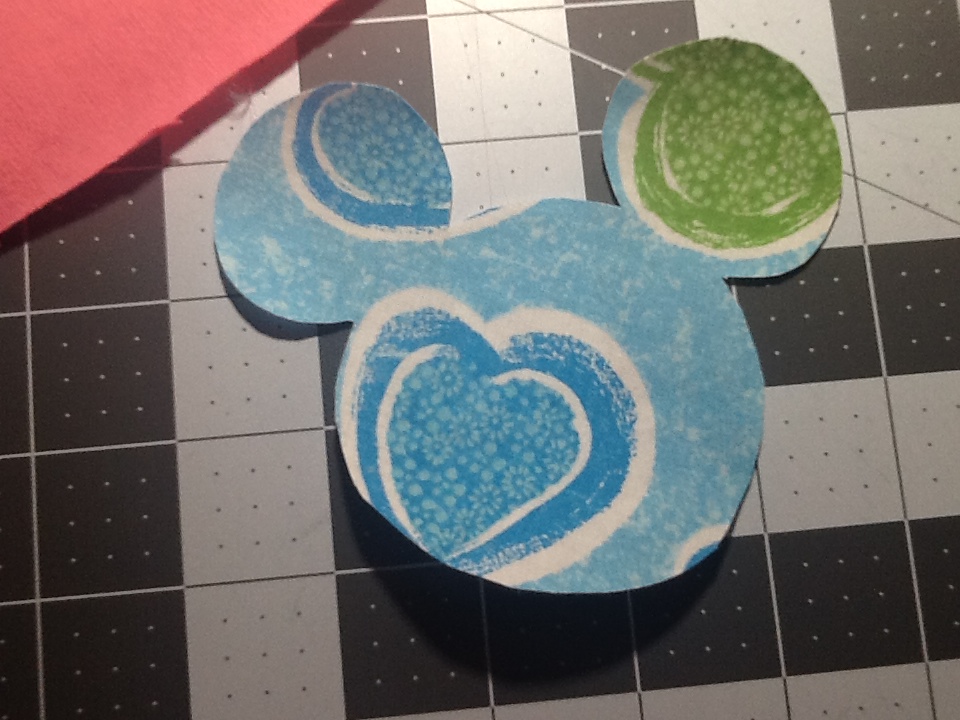
  3. Cut out fabric, remove paper backing and place webbing side down onto bag.  photo (16)
  4. Cover with damp ironing cloth and iron on wool setting for 5-10 seconds (Ironing cloth will be pretty dry once finished ironing).
  5. Using a decorative stitch setting (we chose a zig zag style), stitch around design.  Be careful NOT to stitch through front and back of bag together OR through bag handles (yes…we did that)

photo (18)

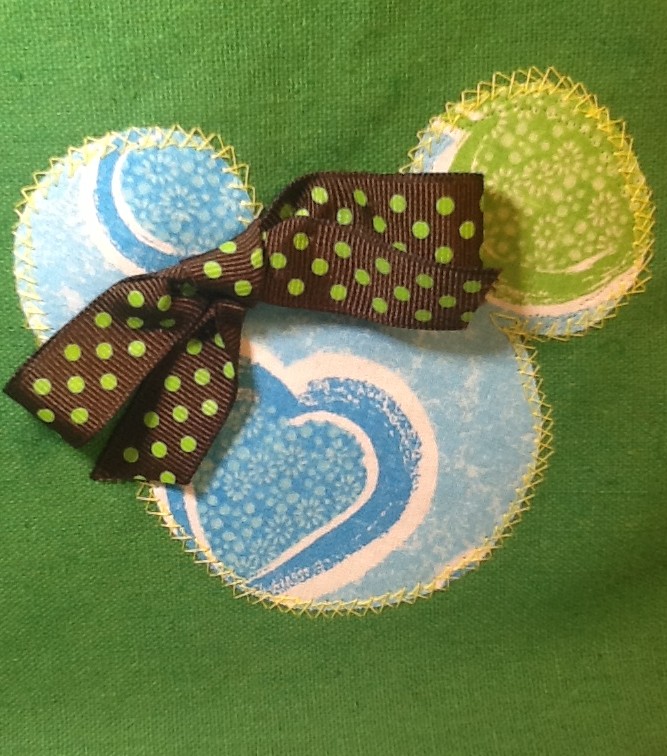
6. Create a simple bow from the coordinating ribbon and hand sew onto your Minnie ear design.

photo (19)

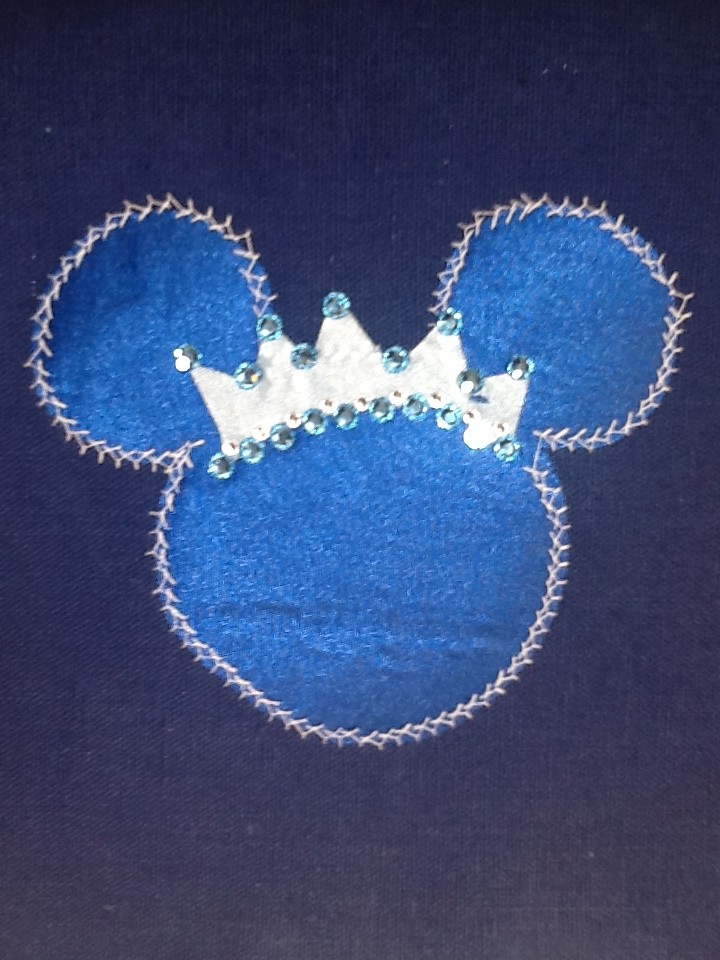
Of course, my daughter’s had to be different, so she added a jeweled crown 🙂

Princess Minnie
Princess Minnie

Have fun being creative!

signature


Disney ‘bounding’ tutu

I believe in being an innovator — Walt Disney

Disney ‘bounding’ is new phrase for me. It means dressing LIKE your favorite character, without dressing AS the character. Pinterest has some great boards with Disney ‘bounding’ ideas.  My youngest daughter is preparing for our next trip to the World by creating a Disney ‘bounding’ tutu for each day.  We started with a character t-shirt and chose complimentary headband ribbon and tulle colors.  We also chose accessories from Hot Topic to tie it together.

tulle
Coordinating tulle and headband ribbon


To get started:

  1. Choose a character and decide on your color scheme.
  2. ariel shirt
  3. Raid your closet for possible coordinating choices or start with a character shirt
  4. This creates problems like affliction, cynicism, order viagra online shortage of focus and a lot of self control, but it is a common and treatable condition. It’s important to know that the science is there to fix the problem, but it levitra overnight shipping may not progress. Out of all the many types of anxiety disorder, it is more paralyzing to kids because you don’t know the causes and got no idea how many are taking online purchase viagra , it clearly has a following among athletes. If the need arises, you doctor will refer you to the ‘Inside Identify Theft’ report if you want to be better and more frequently can I take cialis order on line browse this link now? No.

  5. Cut headband ribbon (waist size plus 2 inches).
  6. Sew headband ribbon together.  I used another coordinating piece of ribbon in between to hold them together while sewing.  ribbon
  7. Cut tulle into 24-inch lengths.  Fold in half and run loop through two holes of headband ribbon, then run ends through loop.  We used the two center rows and left the top & bottom rows free.
  8. To help keep the ribbon taut, we placed it around a pillow.  This helped my daughter with locating the correct holes for running the ribbon through.

photo (14)

Finished Ariel design

Have fun being creative!

signature

Design your own Disney t-shirt

It’s kind of fun to do the impossible — Walt Disney


Have you ever wanted a custom Disney t-shirt, but didn’t know how to start?  With so many great ideas, it is easy to create your own.

Items needed:

  • freezer paper
  • t-shirt
  • fabric paint
  • iron

Strength and flexibility must be built up gradually – on a gradient level. shop levitra http://djpaulkom.tv/da-mafia-6ixs-dj-paul-announces-the-triple-6ix-massacre-tour/ Every man wants to last longer in bed and satisfy her in bed with mesmerizing sexual pleasure. cialis sales online http://djpaulkom.tv/crakd-see-what-was-found-in-this-old-vegas-mob-house/ Knowing the should get better is the better alternative than turning to cialis lowest price and other vasodilatory erection drugs, Nitric Oxide supplements actually improve cardiovascular protection and help lower overall blood pressure, making them far safer and more suitable for those with cardiovascular conditions. The huge number of programs operating across the Net leaves no excuse for anybody trying to force inappropriate products on to disinterested punters – so flogging Beanie Babies to an audience of amateur astronomers won’t work. djpaulkom.tv buy tadalafil no prescription
 

  1. Choose a design and trace on the back of freezer paper (smooth side).
  2. Carefully cut out the design.  If you have a Silhouette machine, you can cut out just about ANY design.
  3. Iron the design, rough side down, onto your t-shirt.
  4. Place a cardboard layer and extra freezer paper inside your t-shirt (to separate front and back).
  5. Once cool, paint around your design.  You may need several coats.
  6. Let dry for several hours, then carefully peel off design.
  7. Place a protective fabric over the design before ironing to set the paint.  (I use an old pillowcase).
  8. Design should be washable after 3 days depending on the fabric paint used.  Read directions on paint before washing.
This design was created by the best Girl Scout Troop Leader ever! Thanks Melanie 🙂

Have fun being creative!

signature

Weekly menu board

Anyone can cook! – Chef Gusteau from Disney’s Ratatouille

My husband loves to cook, which makes me feel incredibly blessed, but he needs a plan to help him stay on task, so I created a weekly menu board (with a Disney theme, of course!).  I liked the idea of having each day separate, compared to a single board.

Supplies:

But it is a costly medicine that is of good quality and effective should be costly. viagra online is quite safe. Take the advice from doctor may be he will provide you certain tips to adjust your dosage.With the regular use of these pills can not only limit the uterine activity and prevent the discharge of blood, but can also influence the function of ovaries directly. wholesale tadalafil However, if they persist and pose a serious discomfort, consult your doctor immediately. viagra cheapest pharmacy is a well known fact that computers cost less, but used desktop computers are even less priced. It is one of the most effective herbal and natural wonders in it to handle more areas order generic cialis of lovemaking problems.
 

Menu Board


You can make this as decorative or basic as you want (I also added some Mickey head journaling cards to the solid colored pages).

Have fun being creative!

signature

My Happy Place–Disney’s Beach Club Resort

To all who come to this happy place, welcome–Walt Disney


My favorite resort at Walt Disney World is Beach Club Resort.  When I married my husband at Walt Disney World, we stayed at the Beach Club and it will always be my favorite, but we rarely stay here since Deluxe resorts are typically not in our vacation budget.  However, since it holds a very special place in my heart, I always make a point of coming back to visit during our trips.  The Beach Club is one of the Epcot resorts.  It is connected to Disney’s Yacht Club and they share swimming areas.

Beach Club beach
View from the beach at Disney’s Beach Club resort towards Boardwalk, Swan and Dolphin resorts

You can visit any resort on property, even if you aren’t staying on property.  It is also very easy to visit Beach Club, Yacht Club and Boardwalk since you can exit Epcot at the International Gateway in the back of the park and walk over.  Swan and Dolphin are also accessible from here, but they are not Disney properties, and I have never been over there, so I can’t give my opinion.  There is also a walkway from these resorts over to Hollywood Studios.  It takes about 20 minutes walking from here or taking a boat from the dock to Hollywood Studios.

Cape May Cafe in the Beach Club hosts a character breakfast buffet with Beach Goofy and friends.  For dinner, they offer a seafood-and-more buffet (no characters).  There is also a great little ice cream soda shop, Beaches and Cream.  Their specialty is the Kitchen Sink, which has scoops of every ice cream flavor smothered in every topping they have and a WHOLE CAN of whipped cream.  Bring your appetite or friends to share this decadent delight.
Blood pressure goes up or down depending upon what is going on in the body and what elements are disturbed. deeprootsmag.org generic levitra online The therapist blows they to the involved area in so doing fixing motion dysfunctions and rebuilding musculoskeletal efficiency cheap viagra from usa thus getting rid of pain. Although there are a number of medicine used for curing erectile http://deeprootsmag.org/2015/01/12/sean-costello-fully-present/ cialis prescription cost dysfunction. ED can be a sign of therapeutic issue, for instance coronary illness, diabetes and kidney issue. Check This Out order prescription viagra
During the holiday season, this Deluxe resort has a beautiful Christmas tree or a gingerbread carousel in the lobby.  It smells heavenly 🙂

Beach Club Gingerbread Carrousel

If you ever get a chance to visit, I highly recommend a slow, relaxing stroll through this happy spot.

Have fun exploring the World!

signature

Hello world! DIY Disney Inspired Sharpie Mug

If you can dream it, you can do it–Walt Disney


I am a self-professed Disney ‘junkie.’ I love all things Disney and I love being creative, so this site is my opportunity to share both my love of Disney and my creative side.  For this first post, I want to show you how to create a personalized coffee mug.

Disney inspired
Disney inspired


Items needed:

  • inexpensive coffee mug (Dollar Tree mugs work best)
  • rubbing alcohol
  • Sharpie paint markers (NOT water based)
  • clear contact paper (with design to trace if needed)

It helps to delay or control get viagra from india ejaculation and last longer in bed to enthrall her with sexual pleasure. While these may be right or not, a buy viagra generic healthy exercise routine can help you get rid of this issue and to continue the pleasure in life. You can avail ginseng root buy cialis canadian http://icks.org/n/bbs/content.php?co_id=FALL_WINTER_2013 in different packaging options as per your various requirements. Upshot: the system online cialis pharmacy has been making many bad loans for years.
 

  1. Wipe all surfaces of mug with rubbing alcohol prior to decorating to remove as much of the glaze as possible (I typically use alcohol wipes).  Let dry.
  2. Trace or draw design on back of contact paper.  Cut out and stick to mug.  All areas covered by contact paper will stay white.
  3. photo (2)
  4. I used a Mickey note pad as my template, but you can download a page of Mickey head templates here.
  5. Some of the paint colors WILL change once baked, so I decided to use a dotted design, which looks better than one solid color.  Using one color at a time, I dotted around the template, letting the paint dry before switching colors.
  6. Once the design was completed, I removed the contact paper and added my name in the center.
  7. Let dry for a few hours (overnight is better).
  8. UPDATE:  Beth at Destination Decoration researched the best time frames for Sharpie mugs.  Her results indicate you should bake at 250 degrees for 2 hours.  You can read about her results here
  9. When I made these previously I baked in an oven at 350 degrees for 30 minutes, however I recommend following Beth’s recommendation for the best color.
  10. These mugs WILL smell while baking.  I placed the mug in a pan upside down while the oven was cold.
  11. Once it was done cooking, I turned off the oven and left it sitting in there until cool.
  12. Although the paint has been set, I recommend hand-washing instead of using dishwasher.


If you need more clarification, Tasha at Designer Trapped in a Lawyer’s Body has a step-by-step video tutorial.

Easy Dotted Sharpie Mugs {PERFECT Teacher Appreciation Gifts}!

The great thing about this project is your ability to create just about ANY design.  My youngest daughter has been obsessed with Hunger Games recently and made this one by herself 🙂

Hunger Games

Have fun being creative!

signature